


GB – Use the translation tool above to change the language
FR – Utilisez l'outil de traduction ci-dessus pour changer la langue
DE – Verwenden Sie das obige Übersetzungstool, um die Sprache zu ändern
IT – Utilizzare lo strumento di traduzione di cui sopra per cambiare la lingua
ES – Utilice la herramienta de traducción anterior para cambiar el idioma
JP – 言語を変更するには、上記の翻訳ツールを使用してください
CN – 使用上面的翻译工具来更改语言
-
Minimum System Requirements
No results were found
-
Minimum system requirementsMac or PC running Adobe Photoshop CC or higher
-
Recommended inks for analogue printingYou can use your own preferred inks, however, if you wish to print using inks recommended by Touch7, we recommend the following inks:T7-Orange
Pantone® 151
T7-Green
Pantone® 7481
T7-Violet
Pantone® VioletT7-Red
Pantone® Bright Red
T7-Blue
Pantone® 2728PANTONE® is the property of Pantone LLC. All other trademarks or registered trademarks are the property of their respective owners. © Pantone LLC, 2017. All rights reserved.For more information on ink density, ink printing sequence on press, or for our most frequently asked questions, please visit our FAQ section
-
-
Installation
No results were found
-
Touch7 Photo v2.1 or higher – Adobe UXP compatible pluginHow to download and install the Touch7 Photo ECG PluginDownload and double click the Touch7 Photo ECG v2.1.ccx plugin.
This will automatically open up Adobe Creative Cloud and allow you to install the plugin.
_______________________________
If you encounter any issues with the above installation process you can also install UXP plugins using ZXP Installer:
Step 1 Download and install ZXP Installer from here: www.aescripts.com
Step 2 Open ZXP Installer
Step 3 Drag the Touch7 Photo ECG v2.1.ccx onto the UXP icon on the ZXP Installer AppHow to register a 7 day trial license or register the full product with a license codeOpen the plugin from the PLUGINS menu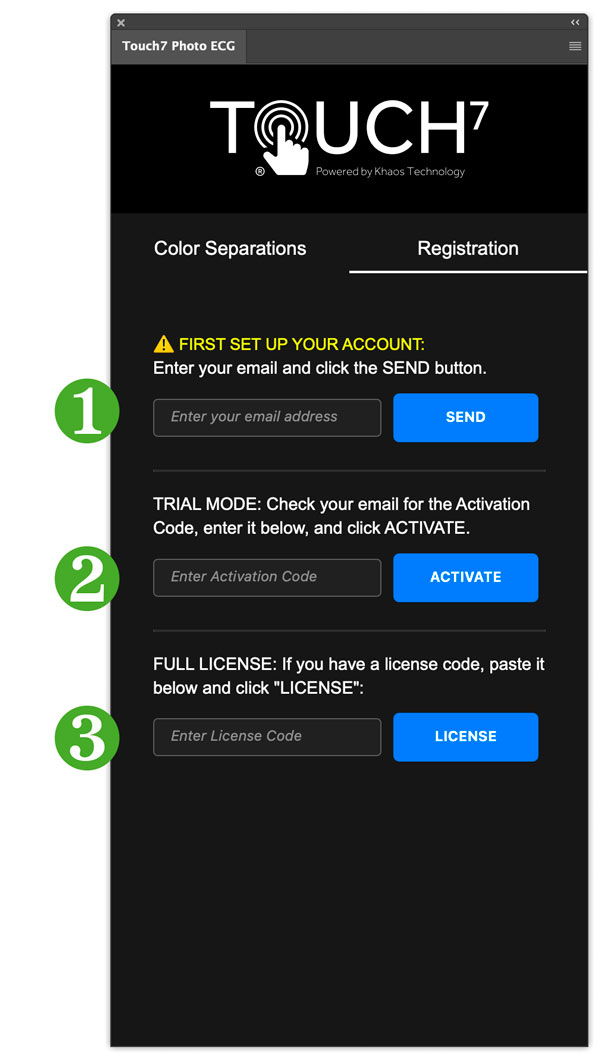 ❶ ACCOUNT SETUP
Type your email address and click the “SEND” button — This sets up an account in our system.❷ TRIAL MODE:
Check your email for an Activation code —paste that code and click the “ACTIVATE” button.
The plug-in will now work in demo mode for 7 days. Trial licenses are restricted to 72dpi @ 1200px output size.❸ FULL LICENSE:
If you have purchased a license code type it in here and press the “LICENSE” button to unlock the full Touch7 Photo plug-in. Your plug-in will now work for the duration of your license.If you have any problems registering your Touch7 Photo ECG plug-in, please contact us for assistance at support@touch7.co
-
-
Touch7 Photo ECG v2.1 or higher – How it works
No results were found
-
Where to find the Touch7 Photo plugin in Photoshop?Touch7 Photo ECG v2.1 or higher:
Your extension should be available from: PLUGINS > Touch7 Photo ECG™ -
Select a Press Configuration SettingAll presses use slightly different coloured expanded gamut inks. It's important that you use the correct press partner from the Press Configuration Settings menu
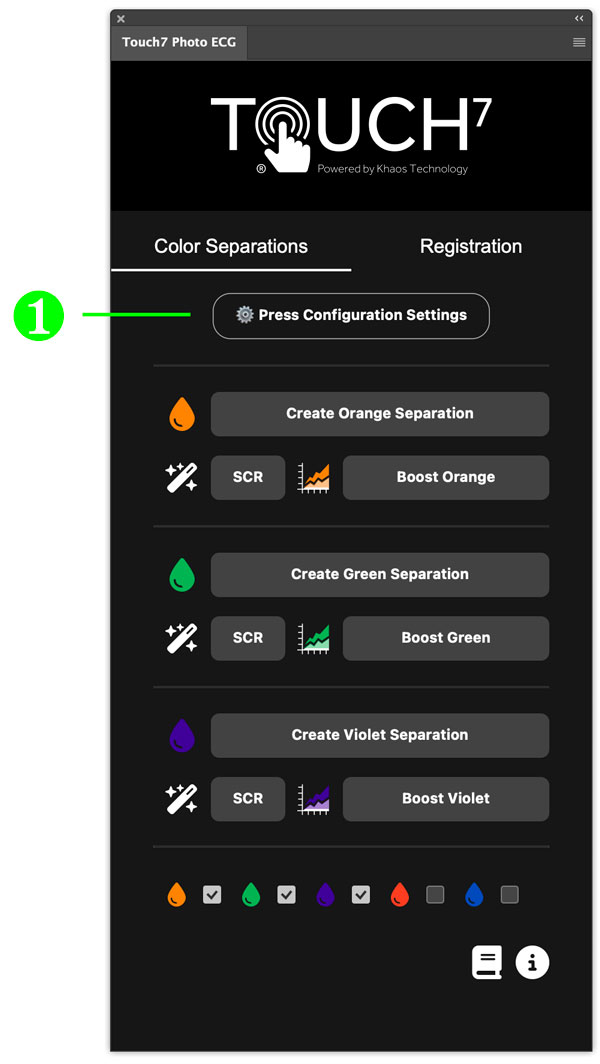 Click on Press Configuration Settings
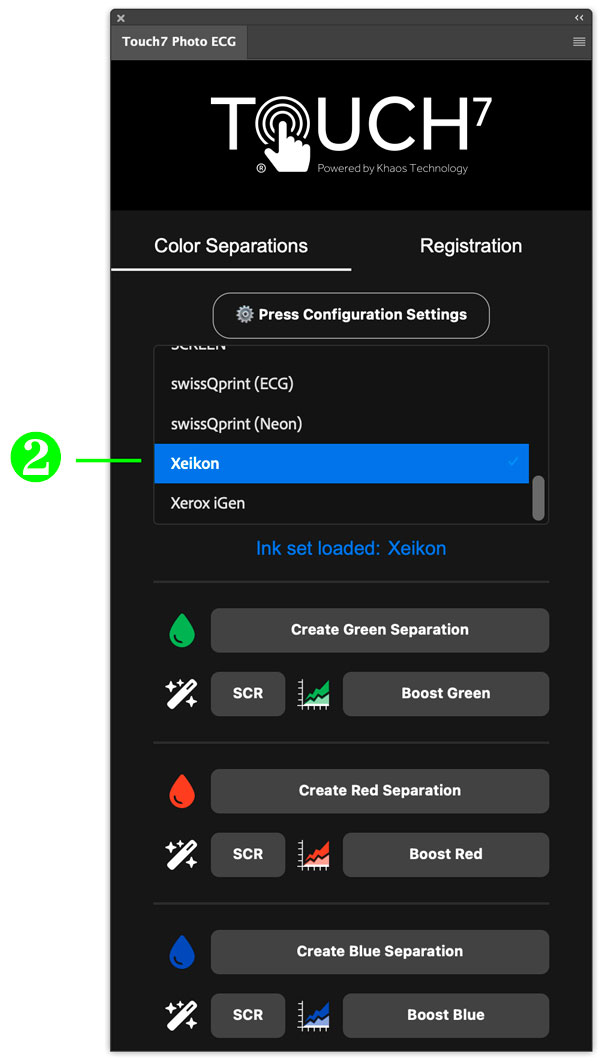 Select your specific press or ink setting
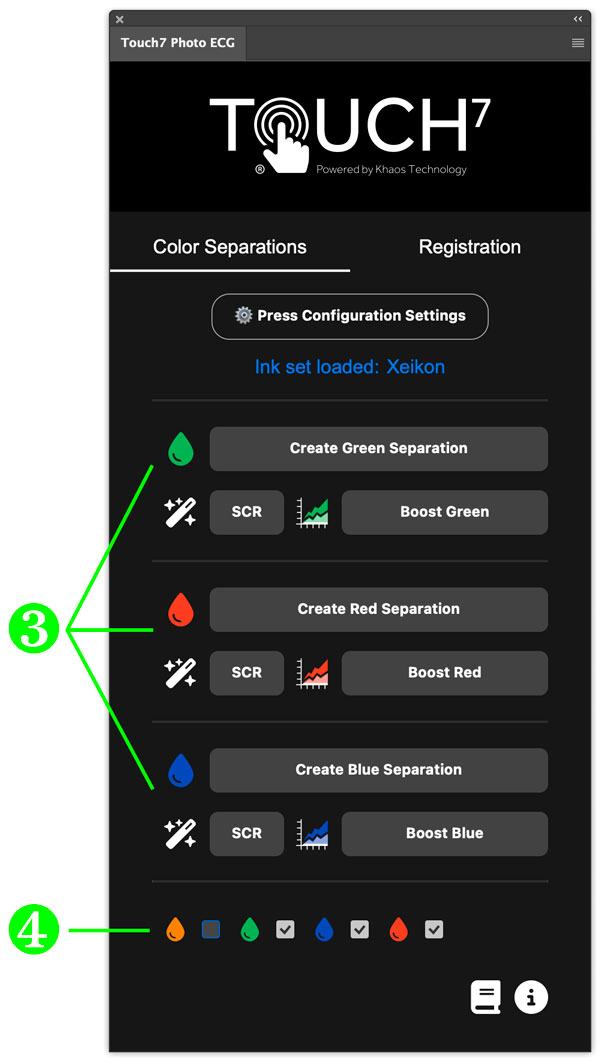 The appropriate ink buttons will load into the PluginNote: For devices that have more than 3 inks, you can use the checkbox feature at the bottom of the plugin to load the specific inks you are using.
 -
Converting an image
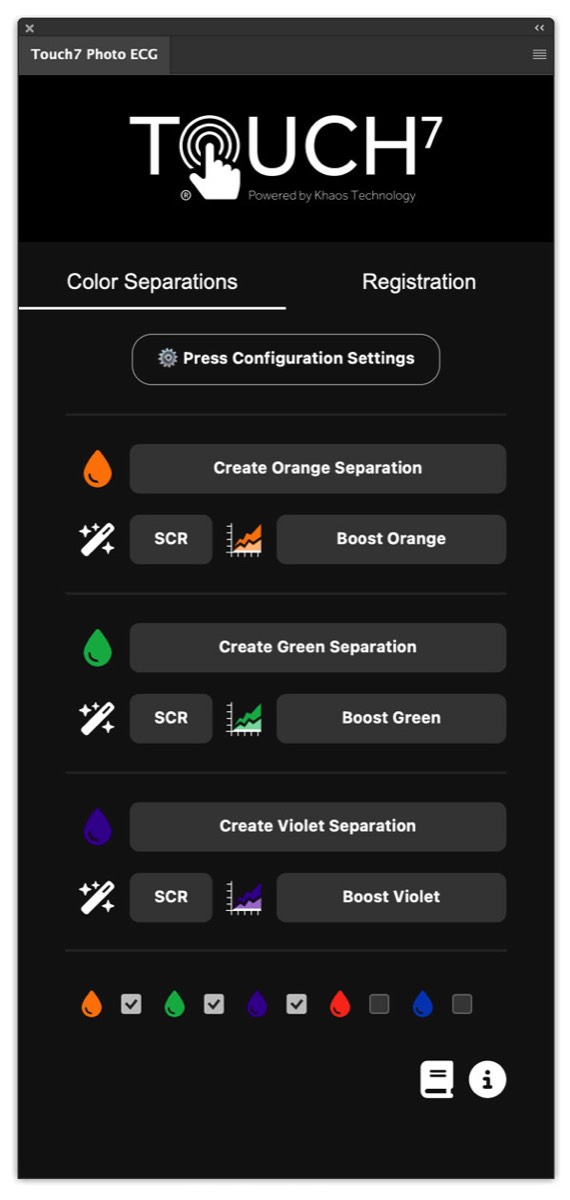 There are three primary buttons for each color:
Create ECG Separation
Generates a specific ECG separation for your image.
SCR
Creates three separate layers with varying levels of color removal (see the SCR section for details). This allows you to choose the best option for your specific image, as different images respond better to different SCR settings.
Boost
Enhances the ECG separation in 25% increments, adding extra color saturation.
TIP: You have full control over where the ECG inks will print. You can edit the Touch7 ECG spot channel in Adobe Photoshop—use tools like the Eraser or Dodge tool to remove areas where you don’t want ECG inks. -
Manually assign a specific LAB value to your ECG channelIf your press or ink set is not available in our Press Configuration Settings, you can manually assign a LAB value after creating the spot color. Simply use the Touch7 preset colors in the plugin and follow these steps:
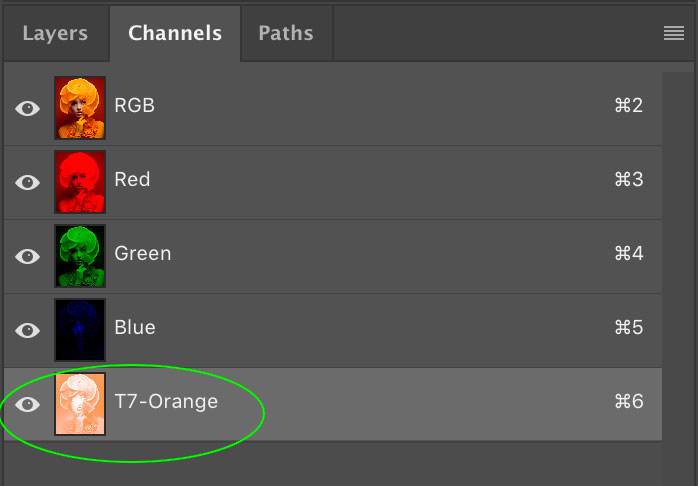 Double click your Touch7 ECG spot channel. In this example we are using the Orange channel.
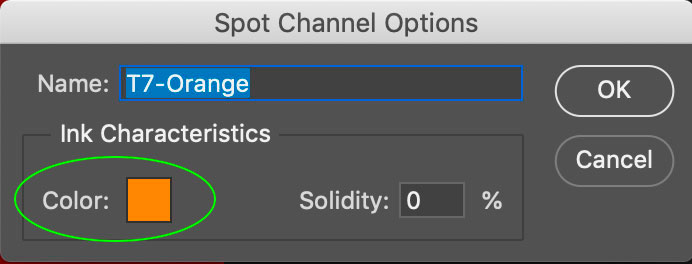 The Spot Channel Options window will open – Click on the Color box
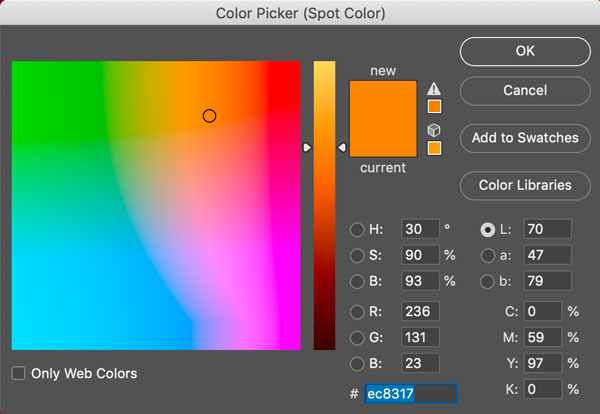 The Color Picker window will open.
Note: If your window opens up showing a color library, such as Pantone, please click the "PICKER" button to bring you back to the Color Picker window.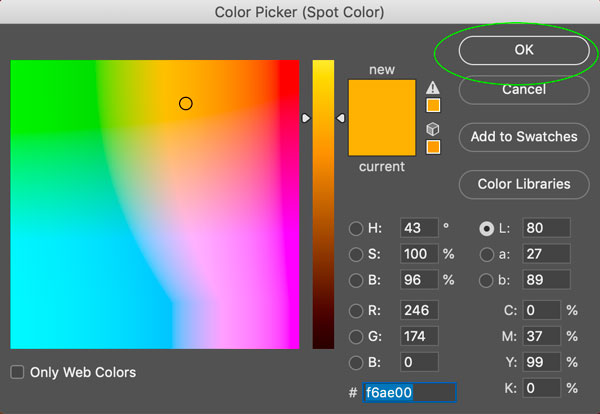 Assign your specific inks LAB value to the settings and click on OK
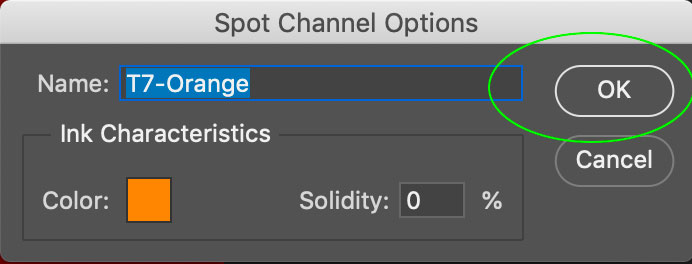 Click OK in the Spot Channel OptionsYour assigned LAB value is now applied, and the SCR and Boost buttons will use it for future calculations.
TIP: You can create an action set of the above process to speed up your workflow. -
Selective image enhancement
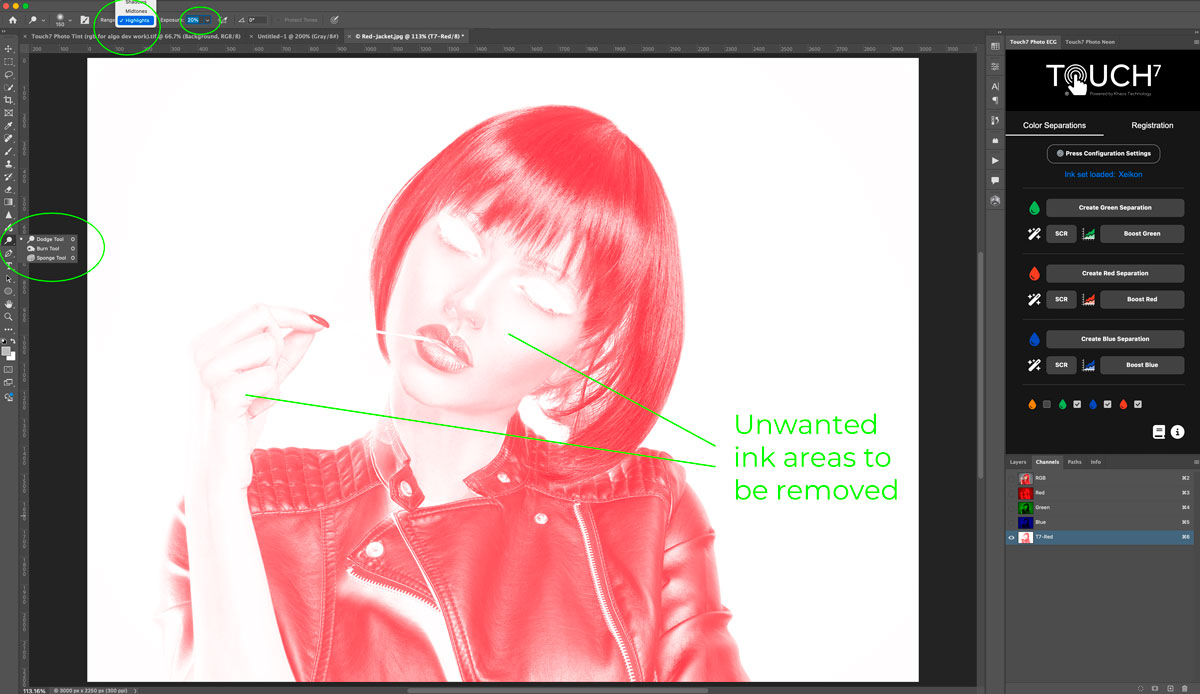 You're in complete control of where the ECG ink prints!
During separation, our algorithm may pick up colored pixels in areas you don’t want to enhance. Since ECG inks are a 5th color that adds to printing costs, it’s best to remove any unnecessary areas from the ECG spot color.
Working in Photoshop, you can use any familiar tools, but we recommend the Dodge Tool:
Set it to Highlights
Adjust the exposure to around 20%
Gently remove unwanted ECG pixels, for example, in skin tones and highlights.
For a detailed walkthrough, check out the Touch7 Photo training video.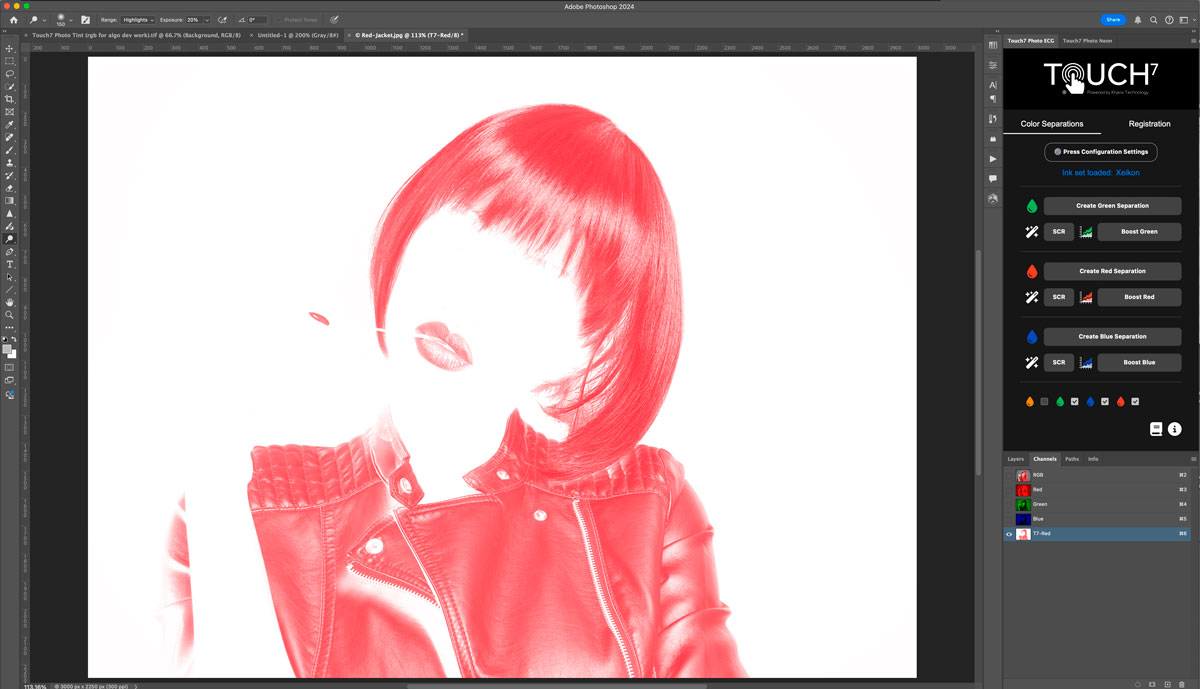
-
SCR (Source Colour Removal)SCR functions similarly to UCR (Under Color Removal), but instead of reducing ink in shadow areas, it removes the equivalent hue of the Touch7 spot colors from the original image. This is especially useful when you want to extract a specific color range and replace it with ECG ink on your press.
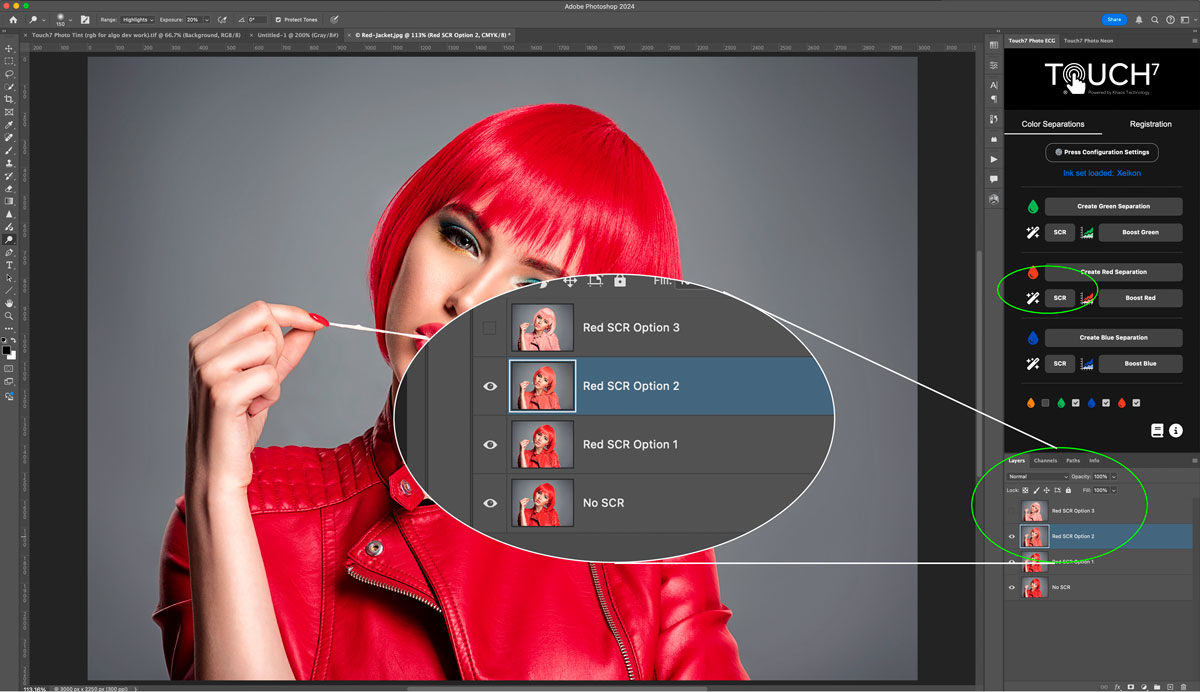 How SCR Works
The SCR button generates three additional layers alongside the original image, each using a different mathematical algorithm to calculate color removal. This allows for precise replacement with the ECG spot color.
Using SCR in Photoshop
Press the corresponding SCR button — Open the Layers Palette – You’ll see four layers:
No SCR – The original image. If printed as-is, the ECG spot color will overprint on top (No SCR is applied).
SCR 1, SCR 2, SCR 3 – Each layer applies a different color removal method. Toggle layers on/off to compare results.
Choosing the Best Option – You can preview the different effects or print all four versions to determine which one works best for your design.
Processing Multiple ECG Colors – If your image contains more than one ECG color (e.g., Orange & Green), you’ll need to apply SCR separately for each.
Note: All images are converted to CMYK using your Photoshop color settings. -
Working with RGB or CMYK imagesTouch7 Photo ECG supports both RGB and CMYK images. However, when using the SCR feature, the final separated image will be converted to CMYK, following the calculated SCR adjustments.
-
Further enhancing your generated ECG separationsYou have full control over your image and can enhance the ECG effect using Levels in Photoshop.
For example, to add more ECG color to a specific area:
Make a Selection – Select the part of the image where you want to increase the ECG effect (e.g., the left side).
Adjust Levels – Open the Levels adjustment and move the shadow slider (left slider) to the start of the histogram. This boosts the deepest, most saturated areas of the ECG spot color to 100%, while ensuring the midtones and highlights scale proportionally.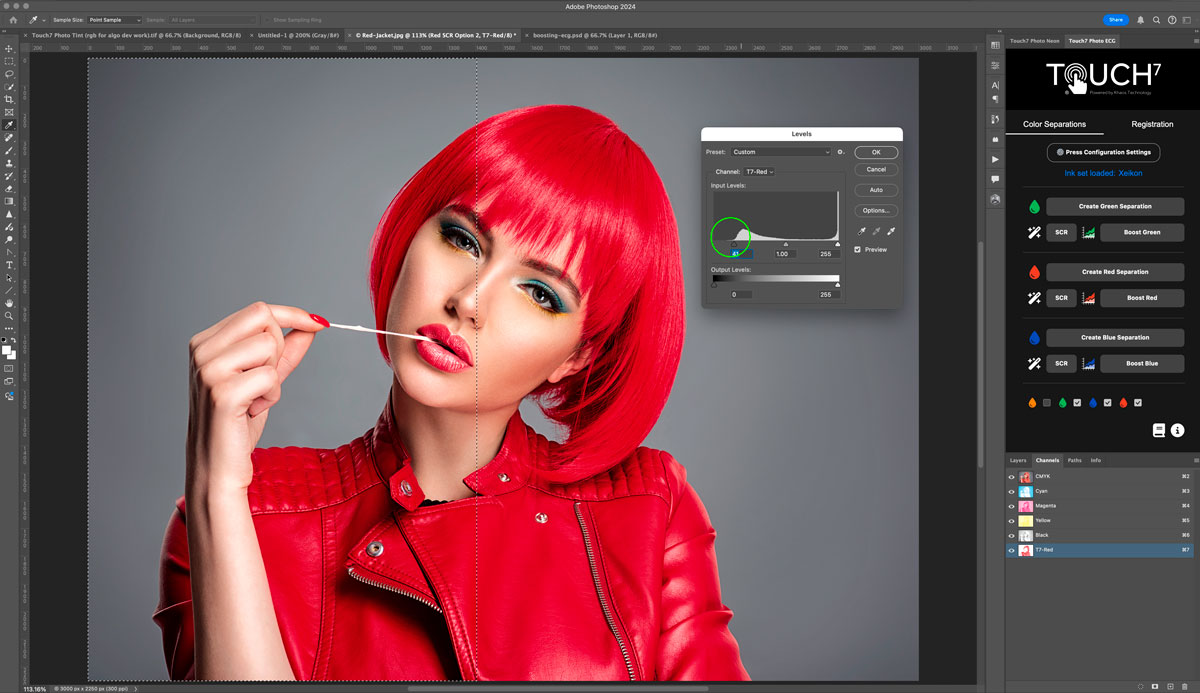
-
Using g the BOOST buttonThe BOOST button increases the overall neon intensity in 25% increments. Each boost adds another 25%, enhancing vibrancy across the entire separation. This provides a quick and efficient way to amplify the ECG effect.
You can also selectively boost a specific area of the spot color by creating a selection. In this instance we are selectively boosting just the left side of the image.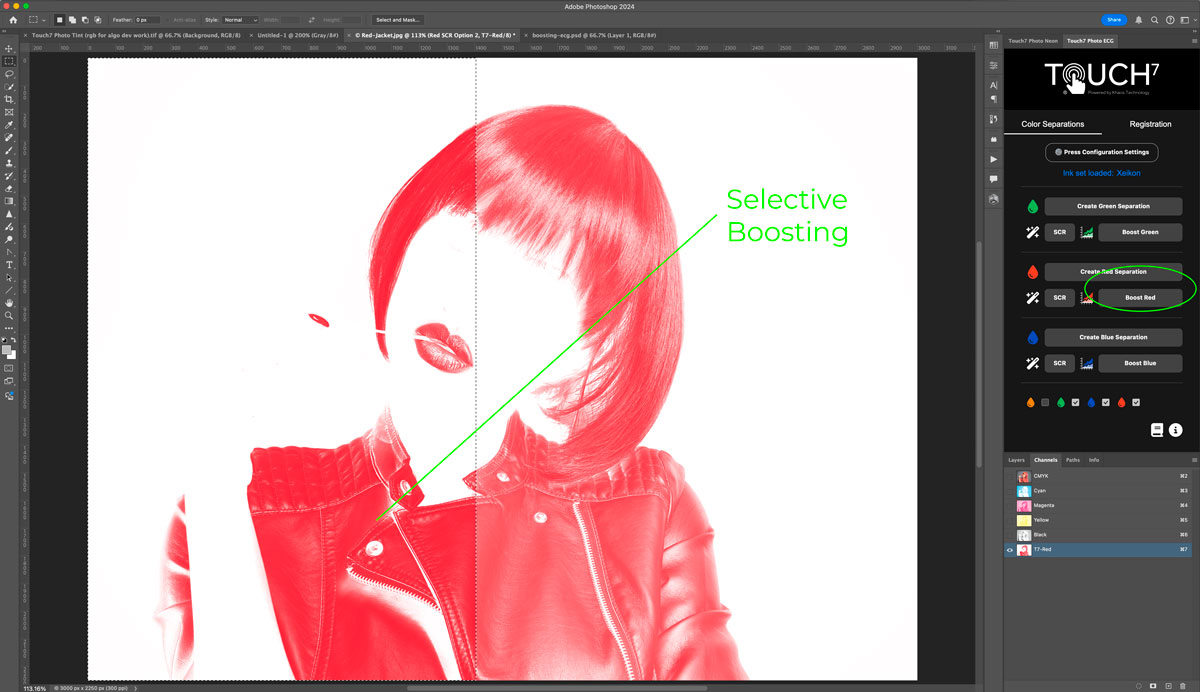
-